
 This online help page is dedicated to the SurgeONE.ai Template Library page and its associated functionalities. You can use this page to create or import new custom templates which can be used to create or edit audits, attestations and vendor assessments.
The accessibility and functionalities of the different sections of this page are dependant on the role based access controls / permissions set for the logged-in user. For more details refer to the Roles online help.
1. Navigating to the Template Library
Click on the left panel Settings menu and then click on the expanded Template Library menu option.
 Fig: 1 - Template Library sub-menu option under the Settings menu option
Clicking on this menu option loads the Template Library page showing the list of all questionnaire templates from all modules existing in SurgeONE.ai. Here is the view of the loaded page.

Fig: 2 - Template Library
2. Understanding the various elements of the Template Library page
Refer to the following screenshot which is marked with numerical values that correspond to the below stated points.

Fig: 3 - Understanding the various elements of the Template Library page
- Search options to filter out results
- + Add Template button to create a new template
- Grid view populates the loaded or filtered template(s)
- ACTION column contains the toggled row-context Edit menu option
- Import Template button to import a template excel file
- Pagination options are provided at the bottom to control the page items limit and to navigate to other page entries
- Download Template button to download a template excel file which can edited and uploaded for the import functionality
 NOTE: The following sub-sections elaborate further to the above-stated points.
2.1. Searching Template Library
Here is the view of filters section:
 Fig: 4 - Search bar, module and status selection filters along with the reset icon
You can use the search bar to enter text and find matching results.
You can also filter out listed items using the Select Module dropdown. All, Audit, Attestation and Vendor Management are provided as the dropdown options.
 Fig: 5 - Module selection filter dropdown options
You can also filter out listed items using the Select Status dropdown. All, Draft and Publish are provided as the dropdown options.
 Fig: 6 - Status selection filter dropdown options
Based on the search input text entered in the search bar, or as per the filters set, or all of the above - matching results are listed out.
 Fig: 7 - Filtered results
Click on reset  icon to remove any search query or dropdown filter set.
 Fig: 8 - Option to reset any filters set
2.2. Creating a new Template
- Click on the + Add Template button at the top right, to proceed to create a new template for your organization.
- A modal window loads where you need to select the module and subsequent category for which this new template will be created. Begin the appropriate module selection by choosing a dropdown option from the Module dropdown. Currently, the following options are provided:
- Audits
- Attestations
- Vendor Management
- Next, select the suitable category of the chosen module. Here is the views of the various categories when each one of the module is selected.
- Financial Compliance Audits
- Cyber Security Audits
- Operational Audits
- Outside Business Activities
- 3rd Party Vendors
- Corporate Governance Compliance
- Data Protection and Privacy
- Code of Ethics Attestation
- Cybersecurity Compliance Attestation
- Request for Attestation Completion
- Attestation of Customer Data Policy
- Attestation Regarding the Handling of Employee Data
- Vendor Assessment Templates
- Click on the Apply button after making the appropriate selections.
- If you do not select an option of the Module dropdown, and click on the Apply button, then the following tooltip gets prompted.
- If you do not select an option of the Category dropdown, and click on the Apply button, then the following tooltip gets prompted.
- If you do not select an option of the Email dropdown (when the Attestation module is selected), and click on the Apply button, then the following tooltip gets prompted.
- A modal window loads titled as Create Section. Enter appropriate name of this new section of this custom template in the Section Name field.
- Click on the Add button to confirm adding this new section.
 Fig: 9 - + Add Template button
 Fig: 10 - Selecting an option from the Module dropdown
When you select the Audits module, then the following options populate the Category dropdown:
 Fig: 11 - Loaded categories when Audit module is selected
NOTE: The Category dropdown is not populated with the respective options until an option of the Module dropdown is selected. Refer to the following screenshot:
 Fig: 12 - Blank dropdown displayed under Category until Module is selected
When you select the Attestations module, then the following options populate the Category dropdown:
 Fig: 13 - Loaded categories when Attestation module is selected
After you select the Attestations module, another additional dropdown field labeled as Email loads.
 Fig: 14 - Loaded email field when Attestation module is selected
When you select the the Corporate Governance Compliance Category dropdown option, the following options populate the Email dropdown:
 Fig: 15 - Loaded emails when Corporate Governance Compliance category is selected
When you select the the Data Protection and Privacy dropdown option, the following options populate the Email dropdown:
 Fig: 16 - Loaded emails when Data Protection and Privacy category is selected
When you select the Vendor Management module, then the following option populates the Category dropdown:
 Fig: 17 - Loaded category when Vendor Management module is selected
 Fig: 18 - Apply button
NOTE: The following three validations are employed on the Add Template For modal window:
 Fig: 19 - Tooltip prompted when Module is not selected
 Fig: 20 - Tooltip prompted when Category is not selected
 Fig: 21 - Tooltip prompted when Email is not selected
 Fig: 22 - Create Section modal
 Fig: 23 - Add button to create new section
The added section gets listed on the left panel of the Add Template view.
 Fig: 24 - View of the newly added section
NOTE:
- Click on the plus
 icon to add questions to this new section.
 - Click on the delete
 icon to remove this new section.
 - Double-click on the section name label to edit it. The following Edit Section Name modal loads. You need to click on the Ok button to confirm the section name change.
- Validation is employed on the section name to prevent duplicate labels. The system will prompt the following tooltip below the field if you proceed to do so.
 Fig: 25 - Add Question and Delete Section tooltips on mouse hover over respective icons
 Fig: 26 - Edit Section Name modal window view
 Fig: 27 - Validation on Section Name field to prevent duplicate entries
2.2.1. Adding Multiple Sections
- Click on the + Add Section button at the bottom of the left panel section list of the Add Template view.
- A Create Section modal window loads where you need to enter the name of this new section.
- Click on the Add button to confirm adding this new section. The added section gets listed on the left panel of the Add Template view.
 Fig: 28 - + Add Section button
 Fig: 29 - Create Section modal
 Fig: 30 - Added section gets listed in the Content section
2.2.2. Adding Questions to a Custom Section
-
Click on the plus icon at the right side of the new section to add questions to it.
- A rich text area loads on the right panel where you can enter the question label, use the various provided options, and set the desired answer type for this question. More details have been elaborated in the below sub-section (2.2.2.1).
- You can choose the type of the desired answer to the new question by selecting an appropriate option of the Answer Type dropdown. The following screenshot displays the various provided options. More details have been elaborated in the below sub-section (2.2.2.2).
- Click on the Add button to submit the custom question to the selected section.
 Fig: 31 - Rich text editor to create the new question to the selected section
 Fig: 32 - Answer Type dropdown options
 Fig: 33 - Add button to submit the custom question to the selected section
The submitted question can be seen added to the selected section.
 Fig: 34 - Selected section showing the added question
NOTE: The system will not permit you to add the custom question if no answer type is set. A tooltip labeled as Select answer type is displayed beside the Answer Type dropdown, as indicated in the following screenshot.
 Fig: 35 - Validation prompted when answer type is not set to the custom question
2.2.2.1. Understanding the Question editing options (Rich Text Editor)
A rich text-based formatting editor has been introduced for defining questions in the Add / Edit Questionnaire module. Refer to the following table to understand the editor functionalities better.
| Rich Text Editor Label | Associated Functionality | Supporting Screenshot |
|---|---|---|
| Bold | Used to make the selected text bolder | 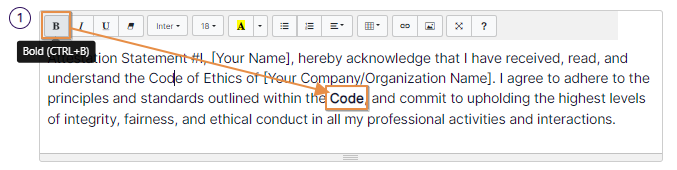 |
| Italic | Used to italicize the selected text | 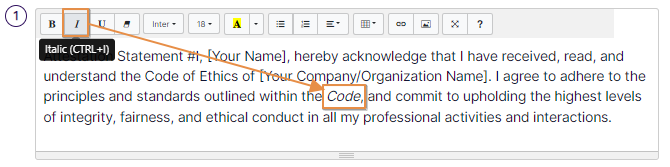 |
| Underline | Used to apply an underline below the selected text | 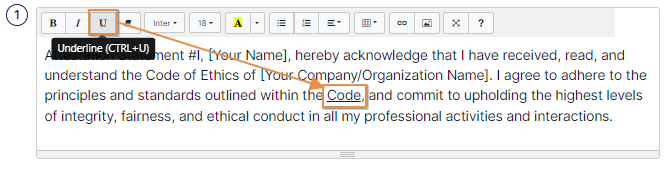 |
| Remove Font Style | Used to remove any applied style to the selected text | 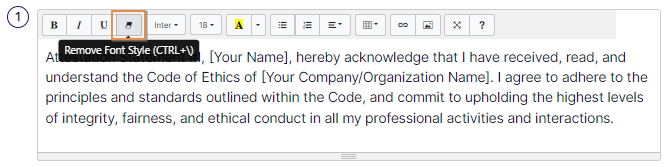 |
| Font Family | Used to set the font style of the selected text. It is set to Inter font by default. The following fonts can be set:
|
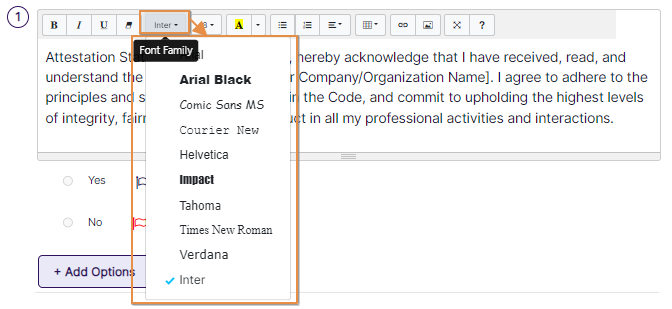 |
| Font Size | Used to set the font size of the selected text. It is set to 18 font by default. The following font sizes can be set:
|
 |
| Recent Color / More Color | Used to set appropriate color to the text or text background | 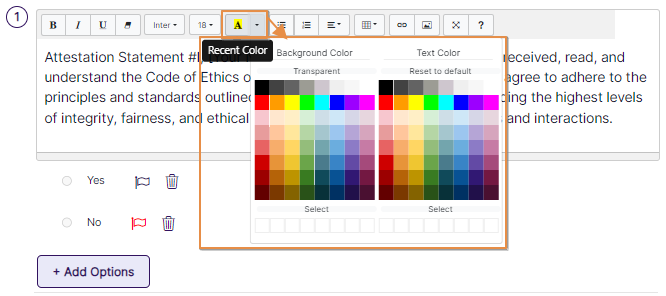 |
| Unordered list | Used to apply an unordered list |  |
| Ordered list | Used to apply an ordered (numerical) list | 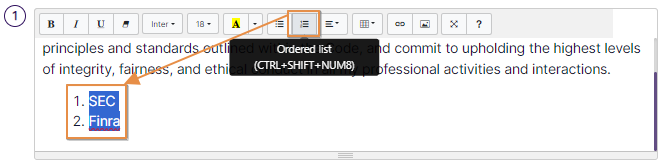 |
| Paragraph | Used to modify the paragraph orientation and indenting | 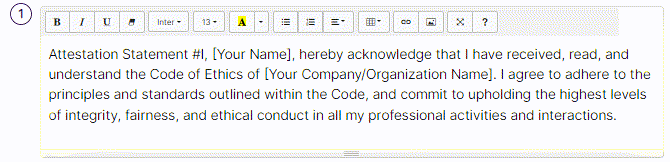 |
| Table | Used to insert a table. The table can have dimension between 1x1 to 10x10 cells. | 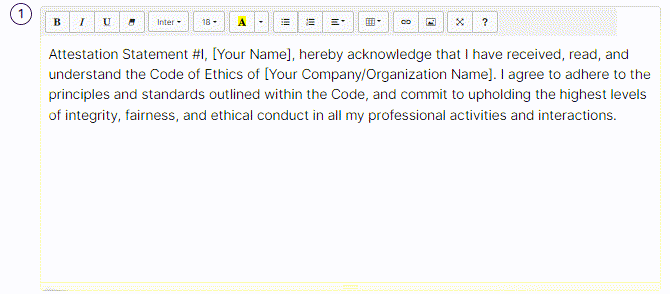 |
| Link | Used to add, edit and remove any hyperlinked text | 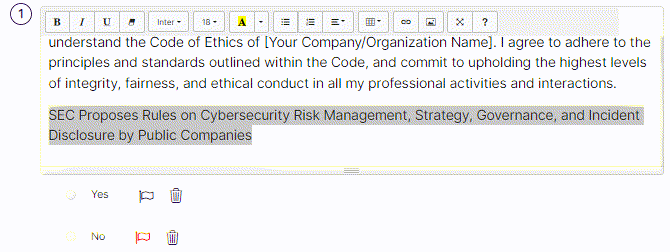 |
| You can view the edit and remove options after the hyperlink is added | 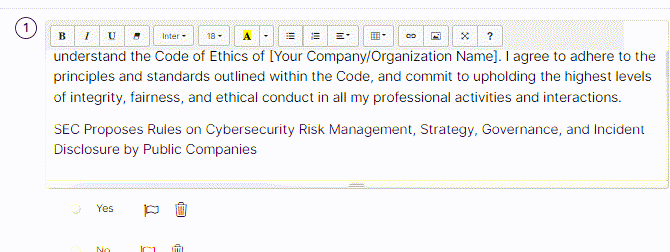 |
|
| Picture | Used to add an image either from your system or URL | 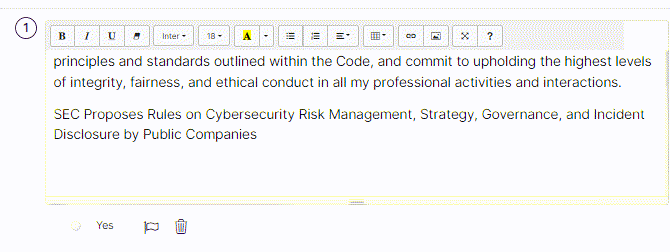 |
| You can use the edit and remove image options after the image is added |  |
|
| Fullscreen | Used to toggle the rich text editor area between normal size and fullscreen mode | 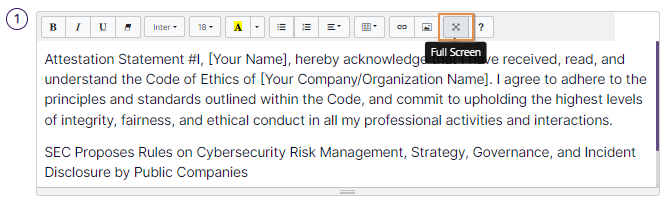 |
| Help | Used to load the help modal window which can be referred to implement more content editing options | 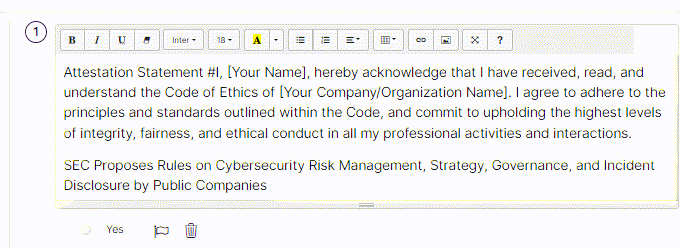 |
2.2.2.2. Understanding the Answer Types
You can choose the type of the desired answer to the new question by selecting an appropriate option of the Answer Type dropdown.
Fig: 36 - Answer types
Refer to the following table to understand the various answer types better.
| Answer Type | Associated Functionality | Supporting Screenshot |
|---|---|---|
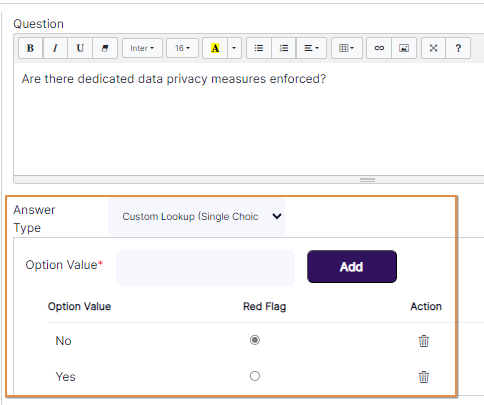
| Custom Lookup (Single Choice) | Used to add a set of option values, out of which only one can be selected during answering.
A new field labeled as Option Value loads below the Answer Type dropdown after you select the Custom Lookup (Single Choice) dropdown option. Enter the text which you wish to set as the option label. Click on the Add button to insert it. Multiple options can be added. The added option(s) get listed below the field under the Option Value column.
|
 |
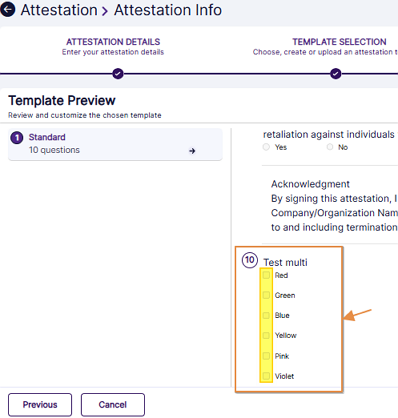
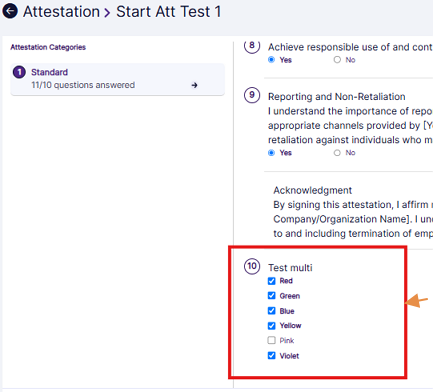
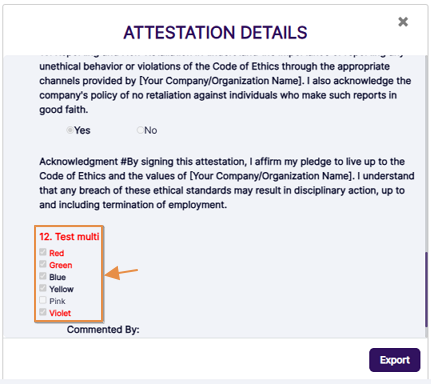
| Custom Lookup (Multiple Choice) | Used to add a set of option values, out of which only one can be selected during answering.
A new field labeled as Option Value loads below the Answer Type dropdown after you select the Custom Lookup (Multiple Choice) dropdown option. Enter the text which you wish to set as the option label. Click on the Add button to insert it. Multiple options can be added. The added option(s) get listed below the field under the Option Value column.
|
Here is the view of the options created during template creation/editing. 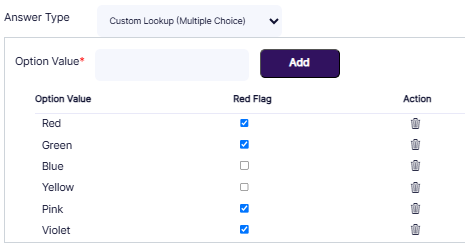 Additional Information:
 |
| Text | Used to add a question whose response type is text based user input | 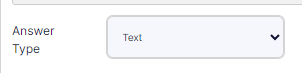 |
| Number | Used to add a question whose response type is a numeric whole number user input |  |
| Float | Used to add a question whose response type can be a decimal number | 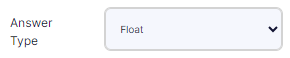 |
| Date | Used to add a question whose response type is to select a calendar date in the given format |  |
| Label | Once you enter a block of text like one or multiple paragraphs in the question RTF area and select answer type as Label, then this will be rendered as a text during execution time and the system will not expect any answer against this question | 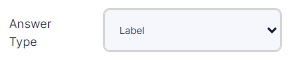 |
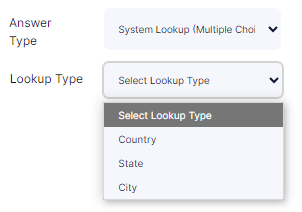
| System Lookup (Single Choice) | Used to set a lookup value type (defined in the system) response to the question. You can set either Country, State or City as the lookup type. Depending to the set lookup type, respective options will populate the dropdown during user response. The user can choose any one dropdown option as the response.
|
 |
| System Lookup (Multiple Choice) | Used to set a lookup value type (defined in the system) response to the question. You can set either Country, State or City as the lookup type. Depending to the set lookup type, respective options will populate the dropdown during user response. The user can choose one or more dropdown options as the response.
|
 |
| File Upload | Used to add a question whose response requires the user to upload the relevant file | 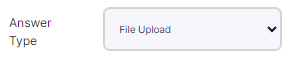 |
 button can be seen under the Red Flag column, next to each added option. User can click on any one to select the radio
 button and set that option or response to be considered as a flagged response in the system. If that response is selected during responding/processing, then it would required remediation.
 icon can be seen under the Action column, next to each added option.
NOTE:
icon can be seen under the Action column, next to each added option.
NOTE:
- You must mention the option value label before clicking on the Add button. Otherwise, the system will display the following tooltip below the Option Value field.
- You must mention the option label to a custom lookup answer type field. Otherwise, if you try to add the option without any label, the system will display the following tooltip below the Option Name field of the Add Option modal window.
- You must add unique options to a custom lookup answer type field. Otherwise, if you try to add duplicate options, the system will display the following tooltip below the Option Name field of the Add Option modal window.
- You must add at least two options to a custom lookup answer type field. Otherwise, if you try to add the answer type to a custom question, the system will display the following tooltip below the Option Value field.
- User can click on any delete icon to remove the corresponding option of a custom lookup answer type field. The following success notification gets displayed after the custom option is deleted.
 Fig: 37 - Tooltip prompted when option value label is not specified during adding it
 Fig: 38 - Tooltip prompted when option name is not specified while creating it
 Fig: 39 - Tooltip prompted when at least two options are not added to a custom lookup answer type field
 Fig: 40 - Tooltip prompted when duplicate option name is provided
 Fig: 41 - Option value deletion success notification
2.2.2.3. Editing an added Question of a Custom Section
If you need to make changes to the submitted question, then double click on the question displayed on the left panel of the expanded section view. Click on the Save button once changes are done.
 Fig: 42 - Double clicking on added question loads the editable content on the right panel
NOTE:
- The permitted user has the ability to edit questions with custom choice type answers by adding / removing options and assigning red flags to the options.
- You cannot change the answer type in the edit question mode.
- You cannot use the add or delete icon of the Content section which is being edited during the edit question mode.
- The + Add Section button at the bottom of the left panel section list, and the Save and Publish buttons at the top-right are also disabled during the edit question mode.
 Fig: 43 - Add and Delete icon disabled for selected section during edit question mode
 Fig: 44 - + Add Section button disabled during edit question mode
2.2.2.4. Deleting a Content Section
-
If you need to remove any section, then click on the delete section icon at the right of associated Content section.
- A confirmation modal window loads. Click on the Yes button.
- The section gets removed.
 Fig: 45 - Confirmation modal prompt prior to section deletion
NOTE:
- You cannot delete the section if it is the only section displayed under the Content section.
- You cannot delete the section if it contains questions.
 Fig: 46 - Cannot delete prompt when only one section is present
 Fig: 47 - Cannot delete prompt when the section has questions present
2.2.2.5. Deleting an added Question of a Custom Section
- If you need to remove any submitted question, click on the question first.
-
Then click on the delete icon at the top-right.
- A confirmation modal window loads. Click on the Yes button.
 Fig: 48 - Delete question icon
 Fig: 49 - Confirmation modal prompt prior to question deletion
NOTE:
- User cannot delete a question if the question has one or more child questions.
- You cannot delete the question if you do not select it first.
 Fig: 50 - Cannot delete prompt if the question has one or more child questions
 Fig: 51 - Cannot delete prompt if the question is not selected
2.2.2.6. Add a Dependent Question
- Select a question from the Content section to convert it to a dependent question.
-
Click on the make child
 icon on the top-right bar.
- A modal window loads with a dropdown list showing all the existing questions of the section.
- Select a dropdown option of the Dependant on Answer dropdown. Currently Yes and No values are populated.
- Click on the Ok button after making the appropriate dropdown selections.
- You can notice that the dependent question gets indented under the parent one.
 Fig: 52 - Make child icon
 Fig: 53 - Make Child Of modal
Select a question from this list as the Parent question.
 Fig: 54 - Selecting Parent Question
 Fig: 55 - Dependant on Answer dropdown options
 Fig: 56 - Ok button of modal window
 Fig: 57 - Dependent question gets indented under the parent one
NOTE:
- The Dependant on Answer field appears only if the selected parent question has a custom lookup type answer. A question cannot be made a child if it already is a parent question.
- You cannot make a question as a sub-question if it is already so.
- You can also make child of a question when the question of a section is not selected.
- You can also make child of a question without selecting an option of the Dependant on Answer dropdown.
 Fig: 58 - Notification prompted when trying to make sub-question out of an existing sub-question
 Fig: 59 - Notification prompted when when the question of a section is not selected when trying to make child
2.2.2.7. Remove Dependency from a Question
- Select a sub-question from the Content section to remove its parent question dependency.
-
Click on the remove child
 icon on the top-right bar. A modal window loads to obtain your confirmation. Click on the Yes button.
- You can notice that the indentation of the question gets removed and it gets listed at the bottom of the Content section (without any parent question to it).
 Fig: 60 - Confirmation modal prompt prior to question dependency removal
 Fig: 61 - Indentation of the question gets removed as it gets listed at the bottom of the Content section
NOTE:
- You cannot remove dependency without selecting a question.
- You cannot remove dependency of a question that has a child question.
- You cannot remove the parent question dependency of a question if it is not a sub-question.
- Removing dependency sets the question at the bottom of the question list (at the same level of the questions of the section).
 Fig: 62 - Notification prompted when trying to remove dependency of a question that has a child question
 Fig: 63 - Notification prompted when no parent question is found
2.2.2.8. Moving a Question up or down in a Template Content Section
You can change the ordering of questions. Perform the following steps in edit template mode to do so:
- Select a question in the Content section
-
A corresponding up
 and down
  arrow icon can be found below the Publish button at the top right.
- Click on the up icon once to move the question up the list of section questions.
- Click on the down icon once to move the question down the list of section questions.
icon.
- Click on the up
- The question order or rank is now changed (from #4 to #3 question slot).
 Fig: 64 - Options to change question order or rank
 Fig: 65 - Changing question order
 Fig: 66 - Changed question order
NOTE:
- Moving a question up or down will not work when the section has only one existing question.
- You cannot move a question up if the preceding question is a child question.
- You cannot move a question down if the succeeding question is a parent question.
- You cannot move a question up if the question is the first question of the section.
- You cannot move a question down if the question is the last question of the section.
2.2.2.9. Saving Custom Templates
- Click the Save button at the top-right corner.
- A modal window titled as Save Template As will appear to accept the template name.
- Enter a suitable name in the Template Name field to save this custom template.
- Click on the OK button to save this template.
- The new template will be added as a custom template under the specific module that was selected during creation time. Get redirected to the Template Library page, where a success notification gets prompted and the saved template gets listed in the grid view (it gets saved in draft mode and the STATUS column displays the Draft label against it.
 Fig: 67 - Save button
 Fig: 68 - Save Template As modal window
 Fig: 69 - Naming the custom template to save it
 Fig: 70 - Saved Draft version of the custom Template
NOTE:
- Validation is employed when you try to save the custom template. You cannot save using the name of an already existing template.
- You must add a question to a section of a custom template. If no question is present in a section, then that section will get removed. For example, if you create two sections, where the first one has three questions and the second one has no questions added to it, then on save, the latter section will get removed. Also, if there are three sections added, but no questions are added to any, then the custom template will populate the grid view on save, however, no sections will be displayed in the custom template.
- The Save button (and also the Publish button) is disabled in add/edit question mode.
 Fig: 71 - Validation on the Template Name
 Fig: 72 - Top-right buttons disabled in add or edit question mode
2.2.2.10. Publishing Custom Templates
- Click the Publish button at the top right corner.
- A pop-up window will appear to accept the template name.
- Provide a name for this newly created template.
- Click on the OK button to publish this template.
- The new template will be added as a custom template under the specific module that was selected during creation time.
 Fig: 73 - Publishing Custom Template
NOTE:
- Validation is employed when you try to publish the custom template. You cannot publish using the name of an already existing template.
- You must add a question to a section of a custom template. If no question is present in a section, then that section will get removed. For example, if you create two sections, where the first one has three questions and the second one has no questions added to it, then on publish, the latter section will get removed. Also, if there are three sections added, but no questions are added to any, then the custom template will populate the grid view on publish, however, no sections will be displayed in the custom template.
Fig: 74 - Validation on the name of the custom template
2.2.2.11. Viewing the Published Custom Templates
- All published templates created under the Template Library become available from the respective parent modules.
- During execution, one can find these templates under the Customized Templates section for selection.
 Fig: 75 - Customized Templates view
2.3. Understanding the grid view
The grid view displays all questionnaire templates from all modules and its categories existing in SurgeONE.ai. The following columns are present:
 Fig: 76 - Template Library grid view
- MODULE: Displays the module which the template is associated with
- CATEGORY: Displays the category of the associated module
- TEMPLATE NAME: Displays the template name which was provided at the time of creation
- IS SYSTEM? Shows Yes or No label to indicate whether the template is a system defined one or a custom one
- STATUS: Displays the current status of the template to indicate whether it is in a draft state or already published
- CREATION DATE: Displays the date on which the template was created
- ACTION: Contains the vertical ellipsis icon which can be used to toggle the row-context menu option
2.4. Using the Edit context menu option
The following image displays the expanded view of the row-context menu option labeled as Edit (after clicking on the vertical ellipsis icon of the ACTION column.
 Fig: 77 - Row-context Edit menu option
NOTE:
Functionality associated with editing an existing template has been elaborated in previous sections (here).
2.5. Using the Export to Excel context menu option
The following image displays the expanded view of the row-context menu option labeled as Export to Excel (after clicking on the vertical ellipsis icon of the ACTION column against all existing questionnaire templates which are listed.
 Fig: 78 - Row-context Export to Excel menu option
NOTE:
- Clicking the Export to Excel menu option against a questionnaire will download the entire questionnaire in an excel format with a well-defined structure for the users to understand the questionnaire related data properly.
- The downloaded excel file consist of 2 worksheets in the following structure:
- Sections: The Section worksheet has 2 columns – Section ID and Section Description. Section ID column holds a running ID for each of the sections names listed under the Section Description column.
- Question Master: The Question Master worksheet is the crucial worksheet where the questions are exported and listed.
- The Question Master worksheet is of the following structure:
- Section – This column displays all the section names that have been entered in the Sections worksheet.
- Question ID – Here the Question ID for each question is entered. The parent question can be an integer like 1, 2, 3. The next child level question identifier can be given as 1.1, 1.2 and further the third level sub questions can be termed as 1.1.1, 1.1.2, 1.1.3 and so on.
- Parent Question ID – While creating a hierarchy of questions consisting of parent, child and nested child questions, you will enter the question identifier of the parent question in this column against each of the questions. Please note that the question id and parent question id should be same for the top-level parent question or to an orphan question.
- Dependent Answer – This is applicable for a question which is dependent on an answer of its parent question. The answer option is specified in this column for which this question is dependent on its parent.
- Question Details – The questions are populated under this column.
- Type – The answer type for the corresponding question are populated in this column.
- Option <1 – 10> - The Option1, Option2,..Option10 columns are applicable if the Answer Type is Single Option. Each answering option is specified in the columns labelled Option <1 – 10>.
- Option <1 – 10>Red flag – Among the Option <1 - 10>, whichever answering options are marked as Red Flag, has a Y against the corresponding Option<N>Red Flag column. The rest of the options red flag columns has an N. For example, if a question has 3 options – Yes, No and Not Applicable and the second and third options will raise red flags, then it will be similar to the representation depicted in the following image:
- Consider the following screenshot as a sample of an exported questionnaire template:
 Fig: 80 - Sample representation of options and red flags
 Fig: 81 - View of sample data populated in the template
 Fig: 79 - View of the worksheets
2.6. Importing a Template File
- Click on the Import Template button at the top right, to proceed to create a new template for your organization by importing data from an uploaded and compatible questionnaire template in the form of an excel file into the SurgeONE.ai application.
- An Import Template modal window loads where you need to select the module, subsequent category and upload the excel file which this new template will be created on the basis of.
-
Begin the appropriate module selection by choosing a dropdown option from the Module dropdown. Currently, the following options are provided:
- Audits
- Attestations
- Vendor Management
- Next, select the suitable category of the chosen module. Here is the views of the various categories when each one of the module is selected.
- Financial Compliance Audits
- Cyber Security Audits
- Operational Audits
- Outside Business Activities
- 3rd Party Vendors
- Corporate Governance Compliance
- Data Protection and Privacy
- Code of Ethics Attestation
- Cybersecurity Compliance Attestation
- Request for Attestation Completion
- Attestation of Customer Data Policy
- Attestation Regarding the Handling of Employee Data
- Vendor Assessment Templates
- Click on the Choose File button of the Select file field and browse to select the valid, compatible excel file that will be processed by the system to import data from it and subsequently generate the new template.
- Click on the Apply button after making the appropriate module, category and excel file selections.
- If you do not select an option of the Module dropdown, and click on the Apply button, then the following tooltip gets prompted.
- If you do not select an option of the Category dropdown, and click on the Apply button, then the following tooltip gets prompted.
- If you do not select an excel file using the Choose File button, and click on the Apply button, then the following tooltip gets prompted.
- If the selected excel file does not get parsed / processed properly for importing, then the following modal window loads to show the related error.
- The system automatically creates the questionnaire based on the template and allow users to edit it before publishing. The excel questionnaire template is parsed and the questionnaire editor loads with all the sections defined and the questions with all the answering option defined in each of the sections.
- You can edit the name of each of the sections within the questionnaire by double clicking on the section name on the left navigation panel.
- You can edit the question details by clicking on the details.
- For single choice-type questions, you can choose red flags for each choice by clicking on the flag icon or delete an option by clicking on the delete icon.
- You can add new options to a choice-type question by clicking on the + Add Options button and then entering and submitting the value of the new option.
- You can switch between different questions of a section by double clicking on the question.
- Make the necessary changes and you can either save the template in Draft mode or Publish mode. Click on the Save button at the top-right to store your template. The saved template can be viewed from the list of available templates under the specified module and category.
- Click on the Publish button at the top-right to publish your template, so that it is available as the respective custom template of SurgeONE.ai.
 Fig: 82 - Import Template button
 Fig: 83 - Import Template modal window
 Fig: 84 - Selecting an option from the Module dropdown
When you select the Audits module, then the following options populate the Category dropdown:
 Fig: 85 - Loaded categories when Audits module is selected
NOTE: The Category dropdown is not populated with the respective options until an option of the Module dropdown is selected. Refer to the following screenshot:
 Fig: 86 - Blank dropdown displayed under Category until Module is selected
When you select the Attestations module, then the following options populate the Category dropdown:
 Fig: 87 - Loaded categories when Attestation module is selected
After you select the Attestations module, another additional dropdown field labeled as Email loads.
When you select the the Corporate Governance Compliance Category dropdown option, the following options populate the Email dropdown:
 Fig: 88 - Loaded emails when Corporate Governance Compliance category is selected
When you select the the Data Protection and Privacy dropdown option, the following options populate the Email dropdown:
 Fig: 89 - Loaded emails when Data Protection and Privacy category is selected
When you select the Vendor Management module, then the following option populates the Category dropdown:
 Fig: 90 - Loaded category when Vendor Management module is selected
 Fig: 91 - Apply button
NOTE: The following three validations are employed on the Add Template For modal window:
 Fig: 92 - Tooltip prompted when Module is not selected
 Fig: 93 - Tooltip prompted when Category is not selected
 Fig: 94 - Tooltip prompted when excel file is not selected
 Fig: 95 - Error Details modal window
 Fig: 96 - Imported section and its questions view
 Fig: 97 - Edit Section name
 Fig: 98 - View of the newly added section
 Fig: 99 - Configuring options or setting red flag option
 Fig: 100 - Adding option
 Fig: 101 - Switching Questions
NOTE:
- An answer to any question cannot be marked as a Red Flag. This must be done from the Template Library module in SurgeONE.ai, by editing the template after it gets imported from excel.
- A sub question cannot be marked as a dependent question on any one of the answering option of the parent question. This must be done from the Template Library module in SurgeONE.ai, by editing the template after it gets imported from excel.
- When creating a sub question via import, it can be set hierarchically till the fifth level from the parent question.
- Click on the plus icon to add questions to this new section.
- Click on the delete icon to remove this new section.
- You cannot add an option that already exists. The system then throws an error.
- You also cannot submit options if the option name field is blank.
- You can expand/collapse a section by clicking on the respective icon beside the section name.
- For more details refer to the sections > 2.2.1. Adding Multiple Sections to 2.2.2.8. Moving a Question up or down in a Template Content Section. These have not been repeated here since the functionalities are already explained in the respective above sub-sections of this user guide.
 Fig: 102 - Duplicate option validation
 Fig: 103 - Validation on blank option name
 Fig: 104 - Expand or collapse a Section with Questions
2.7. Pagination
Pagination options are provided at the bottom-left, to navigate through multiple pages of templates, which populate the grid view as per the selected count of items per page.
 Fig: 105 - Pagination options
2.8. Downloading Template File
Click on the + Download Template button.
 Fig: 106 - Template file download button
Clicking the Download Template button allows you to download a sample template file with a well-defined structure to help users understand how to enter questionnaire-related data properly in the Excel file so that it is successfully imported into SurgeONE.ai. An Excel file, labeled as SurgeONE.ai-QuestionnaireTemplate gets downloaded. The downloaded file sheets and its pre-populated dataset can be modified appropriately to configure the template structure consisting of various sections, questions and options. This file can later be uploaded via the Select file > Choose File button of the modal window which loads after clicking on the Import Template button.
 Fig: 107 - View of the downloaded file
NOTE:
- The download template consists of 2 worksheets and is structured in the following manner:
- Sections
- Question Master
- The Sections worksheet enlists all the sections (under the SectionDescription column) that this questionnaire template will contain, along with a running section identifier (under the SectionID column) for each of the enlisted sections.
- The Question Master worksheet is the crucial worksheet where you can list each of the questions.
- The following data is to be filled in the various columns of the worksheet for a custom question:
- Section – This is a dropdown list column will display all the section names that have been entered in the Sections worksheet. You can select any one option.
- Question ID – Provide a question identifier value (under the QuestionID column) for any question entered. The parent question (ParentQuestionID column) can be an integer like 1, 2, 3. The next child level question id () can be given as integers like 1, 2, 3, etc.
- Parent Question ID – While creating a hierarchy of questions consisting of parent, child and nested child questions, enter the question id of the parent question under the ParentQuestionID column against each of the questions. Please note that the question id and parent question id would be same for the top-level parent question or to an orphan question, meaning the question that does not have a parent. Refer to the following screenshot:
- Question Details – Enter the question labels under the QuestionDetails column. Refer to the following screenshot:
- Type – Select an appropriate answer type from the options available in the pre-populated dropdown list against each entered question. The available answer types are as follows:
- Date
- File Upload
- Float
- Label
- Multi Lookup City
- Multi Lookup Country
- Multi Lookup State
- Number
- Single Lookup City
- Single Lookup Country
- Single Lookup State
- Single Option
- Text
- Option (#1 to #10) - The Option1, Option2, Option3, Option4, Option5, Option6Option7, Option8. Option9 and Option10 columns are applicable if the Answer Type is set as single or multi option type. Enter each option in each individual option column as required.
- The Option1Redflag, Option2Redflag, Option3Redflag, Option4Redflag, Option5Redflag, Option6RedflagOption7Redflag, Option8Redflag. Option9Redflag and Option10Redflag columns acan be used to define the red flagged options as required, by entering either Y to signify that the option is flagged or N to signify that the option is not reg flagged. The flagged ones will need remediation upon selection during responding to the questionnaire.
- List all the questions in the QuestionMaster worksheet by following the important points discussed above and produce a questionnaire which can be later on imported into SurgeONE.ai.
- Here the view of a custom question setup with dependant responses using multiple choice options.
 Fig: 110 - Selecting custom section label
 Fig: 111 - Various answer types
 Fig: 112 - Setting multiple options
 Fig: 113 - Custom question with dependant responses
 Fig: 108 - View of the default Sections worksheet
 Fig: 109 - Partial view of the default Question Master worksheet